


Welcome to Walls Guide
How To Use Drywall Installation Tools Properly Article
How to use drywall installation tools properly
from:Good drywall installation tools are important to achieve super fine finish. You need to have proper supplies, know the right techniques and use the tools properly in order to get desired results. If you are not a professional, you might end up in mess, which is why you can enroll into a class or simply follow the instructions online to work with drywall.
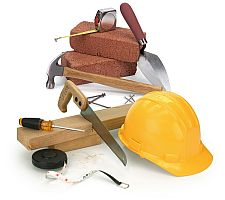
Essential tools needed
Cordless drill is required for drywall screws. You can select the size of the drill according to your requirements, like a bigger drill if you are doing your whole house.
Plaster trowel, corner trowel, hand sander, and block sander or sand paper.
Measuring tape, utility knife for various purposes
Sanding pole, stainless steel mud pan is required for compound mixing.
Steel knives of different sizes, like a 4.5 inch one is needed to fix the tape on the wall and a 10 inch one for finishing purpose.
A large size T-square that is good for accurate measurements and cuts.
Corner tool, either in plastic or steel is a must.
Stepwise procedure
Once you have all the necessary tools, you should get supplies like paper tape, sand paper, drywall sheets, drywall compound, nails, screws, steel ruler etc. Then concentrate on using them correctly in your job. Firstly make a rough sketch and take accurate measurements of your room. This lets you know about the exact number of drywall sheets that you would require for your room. You may choose the type of drywall you require for your room. If its damp area or bathroom, green board suits best.
Start with the top of the wall and then move downwards. Do the ceiling and then you can do the walls. Measure the drywall with the T-square and use the utility knife to split the sheets. While attaching the sheets, be careful not to leave a lot of ridges. If you leave seams then later you will have to do a lot of smoothening activities.
Learn about the various techniques used in this procedure and hang the drywall with the aid of the tapes. Use the finishing knife and tape it firmly, get the extra compound off by using the knife. Use the corner tool to make the corners even and let it dry. Be patient for 1 to 2 days and get ready to sand the drywall. Apply one coat and let it dry, then apply another coat and wait for 24 hours before you sand it.
Give some time to the whole procedure and learn the use of the tools properly before venturing. You can get smooth drywalls for your home if you follow the procedure properly. Make sure that you have the necessary tools and supplies. If everything goes well, you will have an amazing drywall installation.